If you’ve read my previous post “WordPress – Step Two” then you know how to install a commercial theme, create users and assign user roles, and configure all of the primary WordPress settings. Once I have all of the aforementioned in place I will begin adding my content to WordPress.
As you know by now the navigation options are positioned on the left column of the Wp-Admin section. Firstly it is important to note that the WordPress navigation section will change based upon the WP Theme and Plugins installed. By default you’ll have: Posts, Media, Links, Pages, Comments, Appearance, Plugins, Users, Tools, and Settings.
POSTS AND PAGES
The Posts and Pages sections are similar in functionality. When you mouse‐over “posts” you will see: all posts, add new, categories, tags; when you mouse‐over “pages” you will see: all pages, add new;
Okay, so starting with “POSTS” – when you click on “all posts” you will see the title, author, categories (one or more that have been assigned to the post), tags (which you can ignore for now), date (when it was created/published), and featured image (if one has been added). When you mouse‐over a post title you will see “edit”, “quick edit”, “trash”, and “view”.
- Edit ‐ allows you to change text, add a featured image, assign a category, etc
- Quick edit ‐ allows you to change a post category quickly and change it from published to draft.
- Trash ‐ will remove a post to the trash bin, but an article will remain in trash, so can be recovered, until it is deleted from trash.
- View ‐ provides a live view of the page (can be done in the page edit section a well).
In the “Posts” navigation at the left column you will see “Add New”. Select Add New and you will see “Enter title here” which of course is where you add your post title. At the right column on the new post page is “Categories” wherein you select one or more check-boxes to assign the post to this category. If no category is chosen then the default “uncategorized” category will be selected.
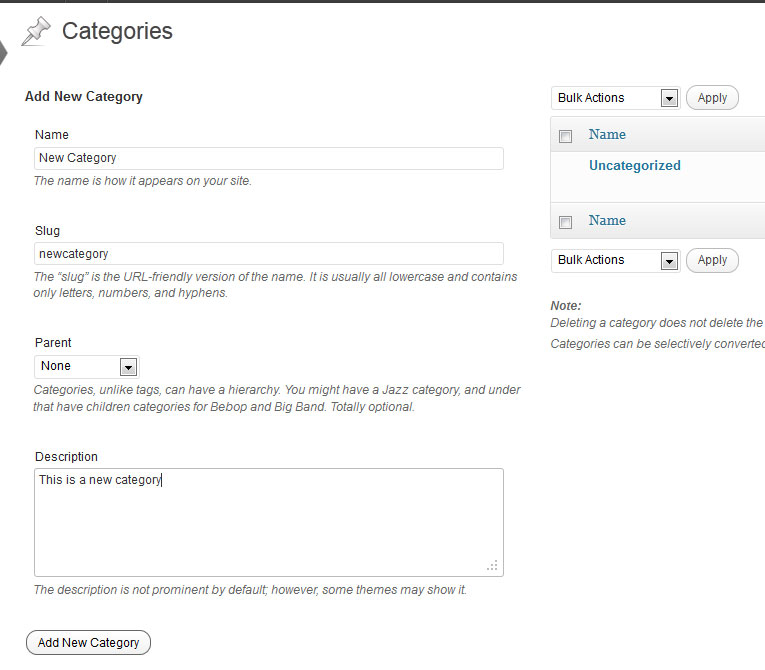
Below “Add New” in the left menu you have a “Categories” link. Click this and you will see the categories created, with the “slug” (what is shown in the URL address bar). Both can be edited but the names have to be unique. At the left you can “add new category”.
Below the categories links is “Tags”. Tags are used to group post types together, yet really aren’t needed, so I would just ignore these for now. If you would like to learn about these go to https://en.support.wordpress.com/posts/tags/
Below the “Posts” section is “Pages”. When you click on “all pages” you will see all of the pages that have been created. At the top left of the page you will see “published” and “Trash”. As with a post you
would click on the page name to edit it, or mouse‐over it and select edit, quick edit, trash, or view.
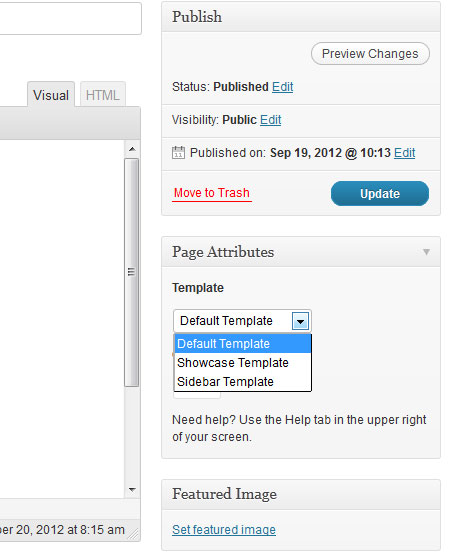
Pages are created almost identically to posts, the only real difference is the option of setting a “Page Attribute” (right column) and specifically the “Template” type. Each WordPress will have its own
template options (which is why having a good Theme is important) – a better one will have a default page, one or more home page variations, one or more portfolio/gallery page options, a left sidebar page, a right sidebar page, a full-width page, and a contact page. If your theme does have a “portfolio or gallery” then you will find that the editing layout is very similar to creating a post and page, yet in most cases the image will be brought into this page type by assigning a featured image (not inserted within the page).
MEDIA LIBRARY
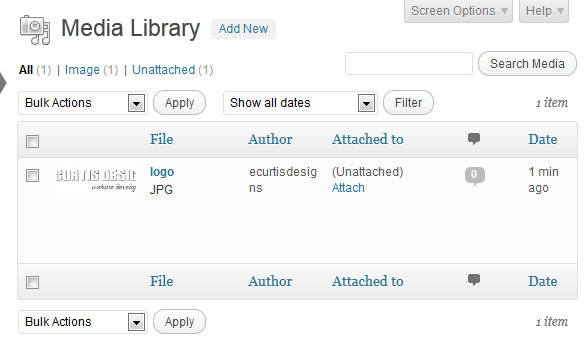
The Media section is where you upload images, videos, pdfs, … basically anything you want to add to/show on a page that isn’t text. When you open this area (click “media” or mouse‐over and select “library”) you will see all of the images (and other media) that have been uploaded. If a media item has been attached (to a post, page or portfolio) you will see the post/portfolio name under the “Attached to” section. Pagination will be shown at the top and bottom “right” (“1 of 2”, etc) as you add more content.
For the existing items if you mouse‐over the name you will see “edit”, “delete permanently”, and “view”. You can also select the check-boxes next to the images/documents and choose the “bulk actions” (apply) wherein you can delete several media items at once. In many cases you will need to use the “edit” section so as to acquire a URL, edit a name, add a description, etc.
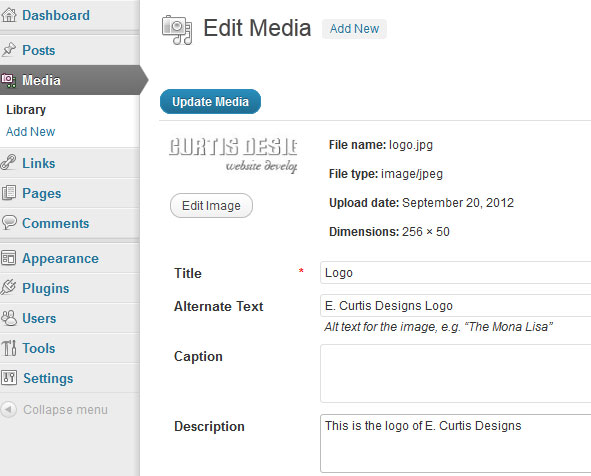
Okay, so when I click edit for the first image I will see the “title”, “alternate text” (what is viewed on mouse‐over), “caption” if you want a caption, “description” (longer explanation of image), and the “file url”. The file url is what you will need to add an image into a page when you have to do it in code view.
The media content is being stored in the folder called “wp‐content” with a sub‐folder of “uploads”, and a dynamically dated sub‐folder of 2012 (year content is added), and another sub‐folder per the month the media was added (09). This is nothing you really need to know unless you need to find the image by FTP access.
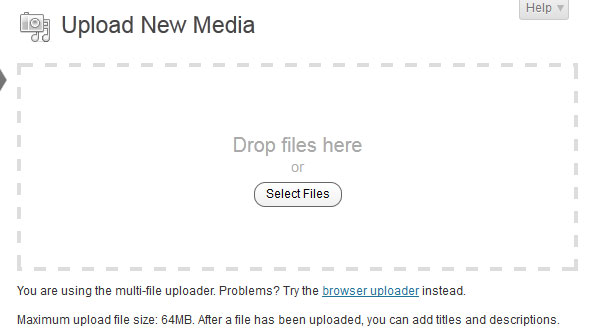
To add new media you will select the “Add New” link. Here you will see the “upload new media” section, with the option of “drop files here” or “select files”. This works just like other file upload managers, but note that you can select multiple images at once for group upload by using cntrl‐click (hold down control button as you left mouse‐click images).
LINKS
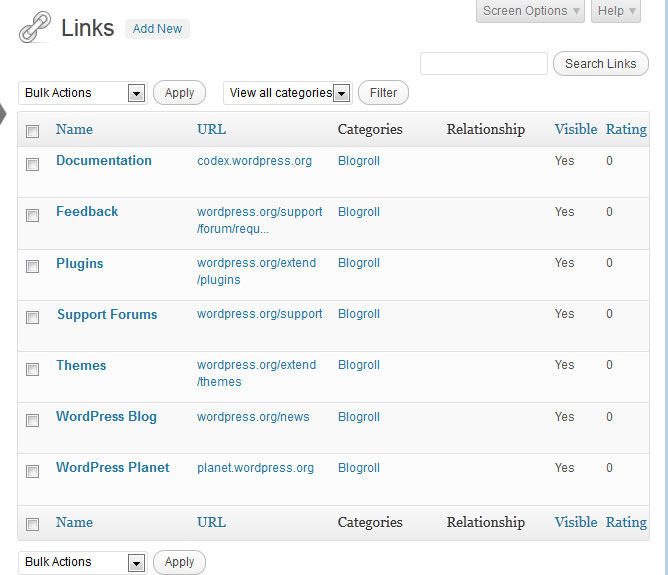
Links is for creating a links list for widgets. Here you have “all links”, “add new”, and “link categories”. All links shows you any links you’ve added with the URL, category, relationship, and whether set as visible or not, and its rating. You could choose to have a link not visible so to make it private if desired (only registered users would see it), or rate it (which I don’t do). The category is important since with this you can assign different links by their category name to a widget. Links will only show if they are assigned to a widget somewhere, be it on the footer, a sidebar, etc.
When you select “add new” you will see the “name”, “web address” (URL to be added), “description” and the category. By default we have the category of “Blogroll”, but if you choose to add links you will want to create unique category names. Below the categories section you will see “Target”. This is important. Be sure to see it as “_Blank” so it opens the link in a new window, otherwise when someone closes the linking page they will have left your website. Below this is the link relationship, and the advanced area (just ignore for now).
The “link categories” works just like post or portfolio categories. You select a name, add a slug (if you don’t add the slug this will automatically be created), a description, if desired, and then select the button “Add new Link Category”. Now going back to “Add New” you would then add the link info, assign it to a category, etc. Remember that you can click the link name or mouse‐over it and select “edit” to make changes to it (same as for posts, pages, portfolio, and media sections).
COMMENTS
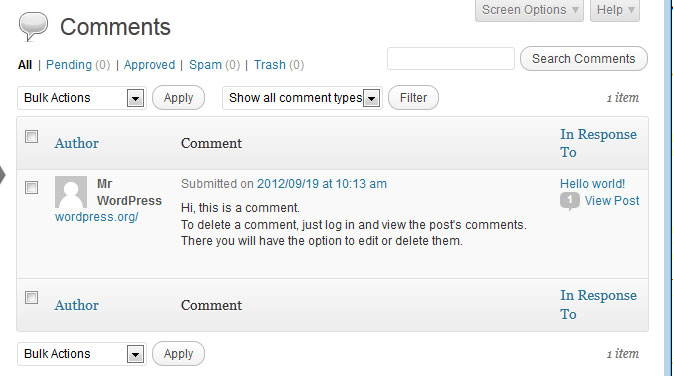
The Comments section will show you any comments you’ve received. Note that I always set comments not to show on a post until they have been approved by an administrator; I also disable comments on pages. As you can see you have one comment currently, the “test” one created by WordPress. When you mouse‐over the author name or comment heading you will see the options of “approve/unapprove”, “reply”, “quick edit”, “edit”, “spam”, “trash”. In some cases you may want to allow the comment yet correct it for spelling/grammar. In this case you would select “edit” … fix it, then “approve” it. A word of caution about comments ‐ many people will say something like “Wow…great post, loved it,…” and you will see the author name is not legitimate, something like “Buy Viagra Online”. Also check the URL to see if it is legitimate. If not, always assign these to spam.
APPEARANCE
The Appearance section contains “themes”, “widgets”, “menus”, and “editor”. Of these the ones I use most often are widgets and menus. The editor allows one to edit the code source files of the theme. This is not something you should do unless you have ample coding knowledge. Themes is where you can assign a different theme if desired; the current default “free” theme “Twenty Eleven” is assigned upon installation which has additional options of “theme options”, “header”, and “background”. Most commercial themes will have its own separate theme editor area for configuring its own “theme specific” options.
WIDGETS
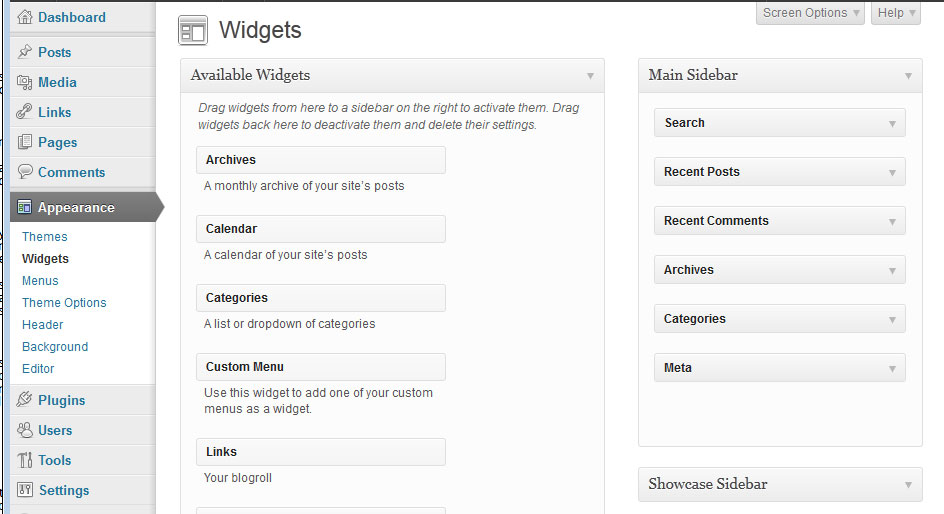
In the appearance area, Widgets are what I typically spend the most time on, especially during the initial set‐up of a website. At the left you will see “available widgets” which can be added to one of the sidebars. The most common of these are “Text” since this allows either plain text or html code. At the right column are the sidebars where widgets are applied. Typically each Theme will have sidebar options that relate to the page types. For example a good Theme might have a default sidebar, blog sidebar, contact page sidebar, footer sidebars, and the ability to create additional “custom” sidebars. The footer sidebar widgets are typically used to add the company name, copyright notice, links to privacy policy page, as additional navigation, links, etc.
If I wanted to add links to a sidebar I would select the “Links” widget (which says: Your blogroll) and then drag and drop it into a sidebar. First though you would open the sidebar. You open a sidebar by clicking on its name, so in this example I would click on “Main Sidebar” and it would expand. If you only add a link name and URL then you would select “Show Link Name” as the option here. Finally you have “number of links to show” enter a value such as ‘5’, and click “save”. If you wanted to have separate link lists on the same sidebar then you would just add another “links” widget and assign it to a different links category. If you want to remove a widget you’ve added, drag it to the bottom left area called “inactive widgets”.
MENU
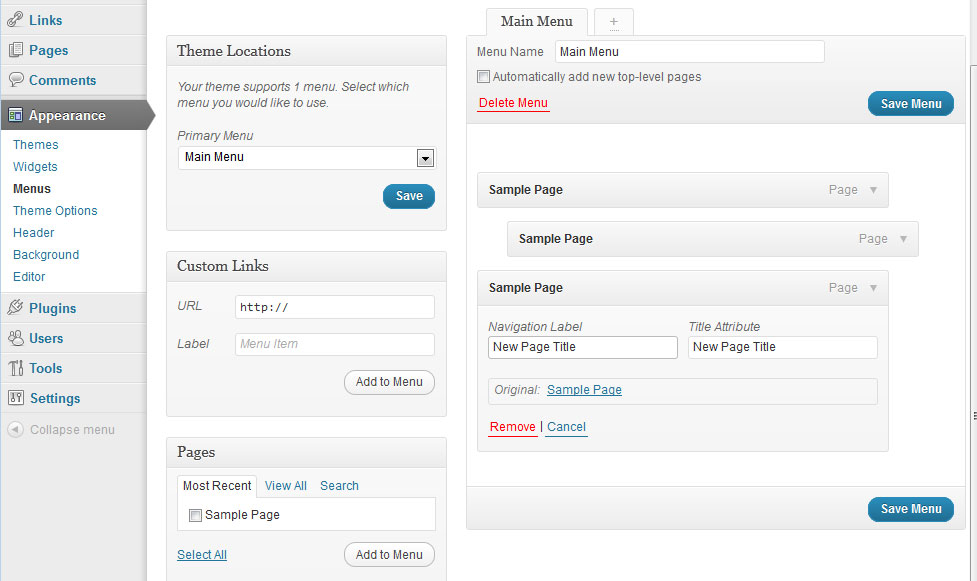
The Menu (under Appearance) is an important area since this will define what pages are linked to the top “main” menu navigation. You won’t need to change this often, but when you add a new page it will need to be added to the menu. Here you add a menu name and assign it to the “main navigation” at the left column. You can create additional menus by using page navigation 1, page navigation 2, etc. In my experience all of the commercial themes will utilize this Menu area to allow for drop-downs, yet the free themes will often just use the default menu creation done by WordPress.
To add a page to a menu simply click a check box next to the page name you want to add (lower left under “Pages”) and select “add to menu” … though you could create a menu based upon “categories” if you wanted (effective for a blog sidebar); once added to the menu you drag the new menu item where you want it. If you wanted it as the first sub‐menu under another menu name you would drag it directly below that page name and slightly to the right; sub‐menus are indented. Note that you can create “custom” links as well so that it wouldn’t be assigned to a WP page, merely work as a navigation header (see custom links at top left) or you could link to another website, a document, etc. When you click on the arrow of custom menu name the box expands and you’ll see URL (I add “#”) which is used for non‐linking pages, the navigation label and the title attribute can be whatever you want; the title attribute is important for ADA accessibility (provides mouse‐over description).
PLUG-INS
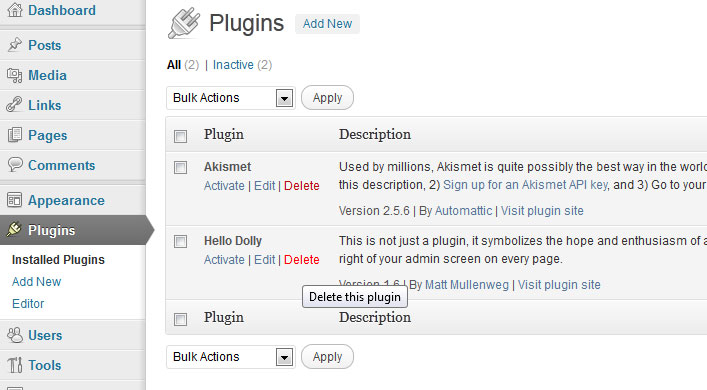
Plugins are used to extend the functionality of WordPress. Currently we only have two plugins installed, one is the “dolly” plugin (I always delete this), and the other is “Askimet” which is a spam blocker. To use this you need to visit their website, create an account, and agree that you’ll not use it for commercial sites, or pay for the commercial license.
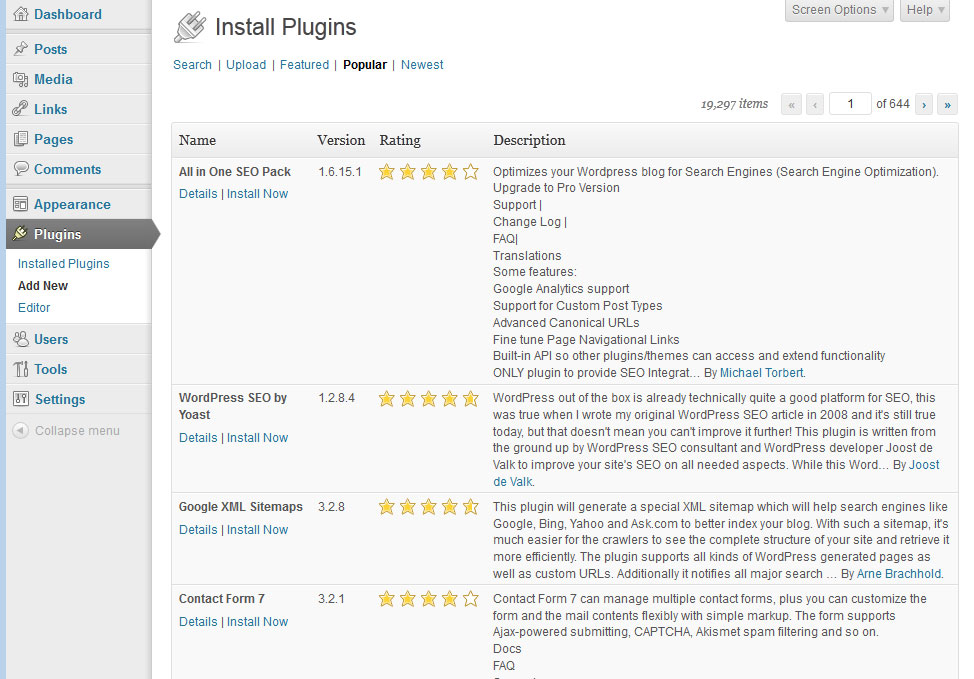
There are hundreds of other plugin possibilities … such as for SEO, Social Media, Ecommerce, etc. You can search for plugins from the “Add New” link, and here you can search by name (such as “SEO”) or my suggestion is to choose “popular”. The popular category will provide you a good overview of what others are using – that being said, always check that the plugin is compatible with your version of WordPress, and read user comments and check the rating to ensure that this plugin is the best one for your specific needs.
It is also important to note that some plugins conflict with each-other, and one of the best ways to troubleshoot a plugin problem is to disable all the new ones, and then add them back one by one until you locate which two (or more) are conflicting. You can also be sure that if you are having a plugin conflict, so has someone else so check online for answers as well.
In “WordPress – Step Four” I will provide you information on the best Plugins and widgets to use, how to work with text and images in pages, popular “shortcodes” of commercial themes, and other tips that will help you create a professional WordPress site.

